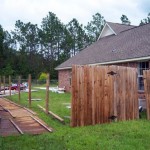
How to Remove an Old Wood Fence (Step-by-Step Guide)
If you're preparing to replace an aging wood fence with a modern, maintenance-free vinyl fence, the first step is removing the old one. Whether your wooden posts are rotting away or deeply embedded in concrete, removing a wood fence doesn’t have to be overwhelming.
At Buy Direct Vinyl Fence, we want your new vinyl installation to go smoothly from the ground up—starting with a clean slate. Use this guide to safely and efficiently remove your existing wooden fence and get ready for your vinyl upgrade.
Tools You'll Need
Before you start swinging hammers or digging up posts, gather your tools:- Work gloves & safety glasses (for safety)
- Pry bar or crowbar
- Hammer or sledgehammer
- Reciprocating saw (Sawzall) or handsaw
- Shovel or post puller
- Wheelbarrow or trash bin
- Optional but highly recommended: Hi-Lift jack or dedicated fence post puller
Step-by-Step: How to Remove a Wood Fence
1. Inspect and Prep the Fence Line
- Walk the entire fence line and remove anything attached, like vines, wires, or decorations.
- If electric lines are nearby or running along the fence, shut off power or contact your utility provider before starting.
2. Remove the Fence Panels or Pickets
- Use a pry bar or crowbar to pull off the pickets or rails, working one section at a time.
- Remove nails or screws carefully.
- Save any salvageable wood if you plan to repurpose or recycle.
3. Cut or Detach Fence Sections (for Panel Fences)
- For pre-built wood panels, remove any fasteners securing them to the posts.
- If panels are too large or awkward, cut them in half using a saw to make removal easier.
4. Remove the Fence Posts
There are three popular ways to tackle post removal, depending on how they were installed:Option A: Dig and Pull
- Use a shovel to dig a circle around the post base (12–24" wide).
- Wiggle the post back and forth to loosen it.
- Pull it out by hand or with a helper.
Option B: Use a Jack or Post Puller
- Wrap a heavy-duty chain around the base of the post.
- Attach the chain to a jack or fence post puller, and lift vertically.
- This is the easiest and fastest method for multiple posts.
Option C: Cut at Ground Level
- If the post is concreted in and too difficult to remove, simply cut it flush with the ground using a reciprocating saw.
- Leave the concrete in place if it's not in the way of your new vinyl fence
Final Step: Clean Up
- Collect and properly dispose of all nails, screws, broken boards, and concrete.
- Sort reusable materials and store them safely if needed.
- Fill in any post holes or level out the soil where the fence once stood.
Pro Tips for Easier Wood Fence Removal
- Soften the ground by soaking it the night before.
- Use a post puller for multiple posts—it saves hours of work.
- Label and store any materials you want to reuse or sell.
- Dispose responsibly — check with your local recycling center to see if they accept treated wood or concrete.
Wood Fence Removal Checklist for Quick Reference
- Safety gear (gloves, glasses)
- Remove attachments and prep area
- Pry off pickets or panels
- Detach or cut panels for easier removal
- Dig out, pull, or cut posts
- Clean up all materials
- Dispose of wood/concrete properly
- Fill or level post holes

